
My husband and I always wanted a place on the lake and years ago we purchased a home on Lake Herrington near our hometown. We have been slowly adding our little touches to different parts of the home to make it our own. Recently we started finishing our dock and built an outdoor bar. It turned better than we expected and love spending time on it with family and friends.

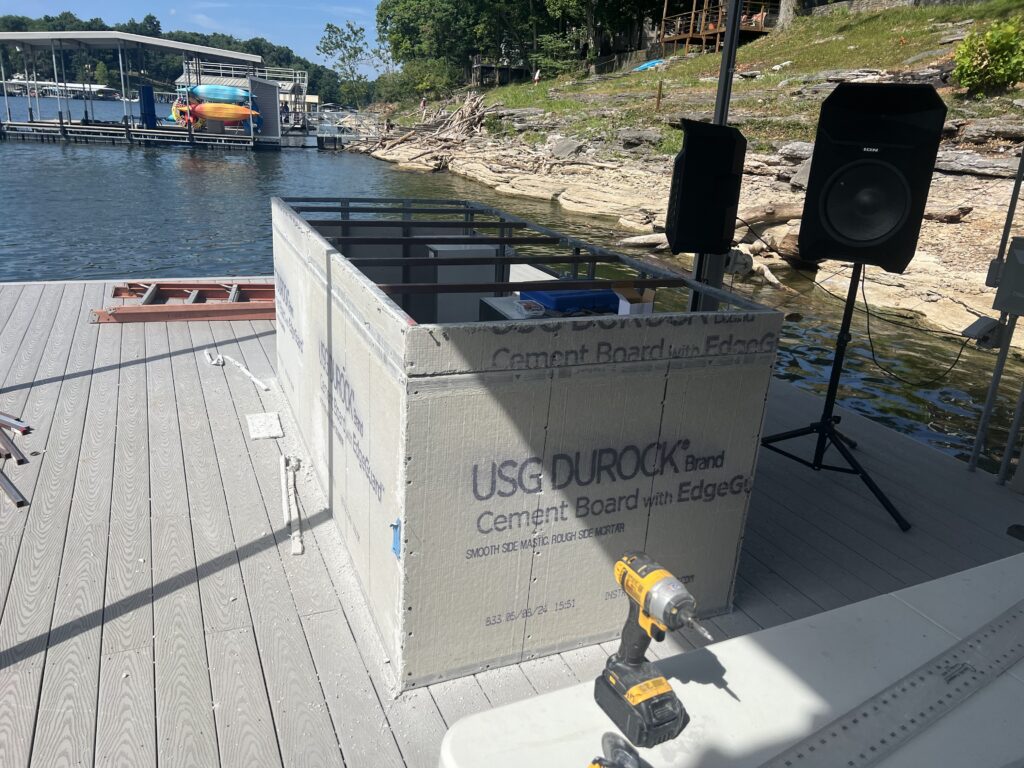
First we started with the base and frame of the bar. We decided the dimensions we wanted and purchased the metal frame online. We did have to purchase some extra square aluminum tubes to help secure it. And we learned this the hard way, but self-drilling screws are a life saver when working with metal.

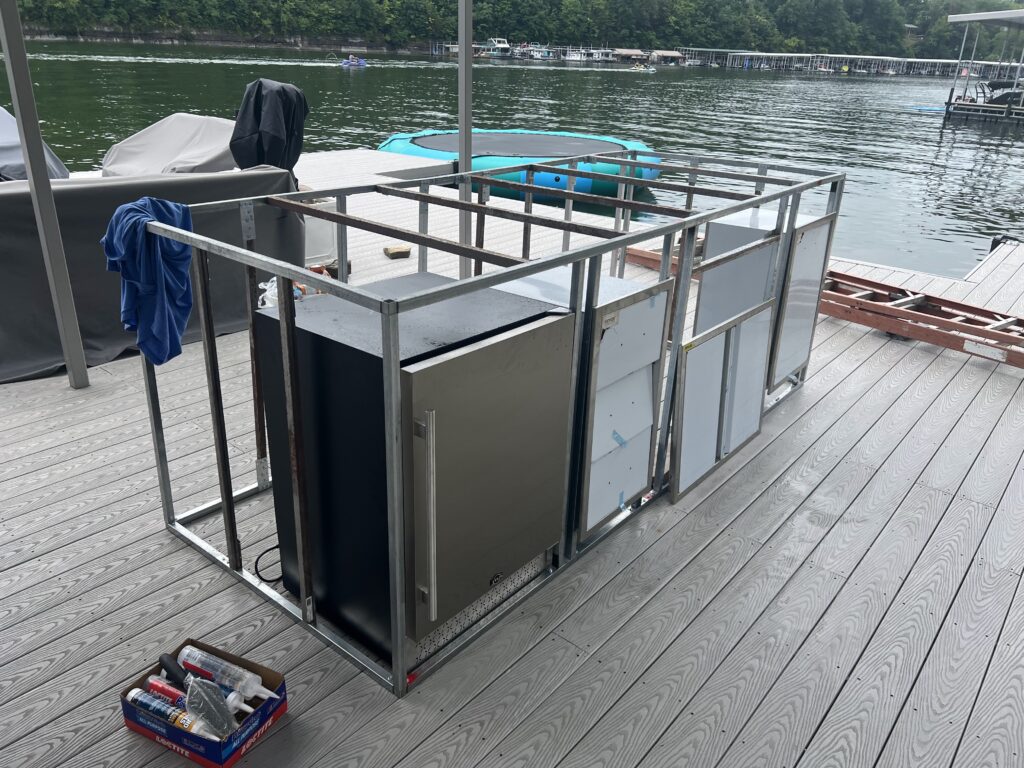
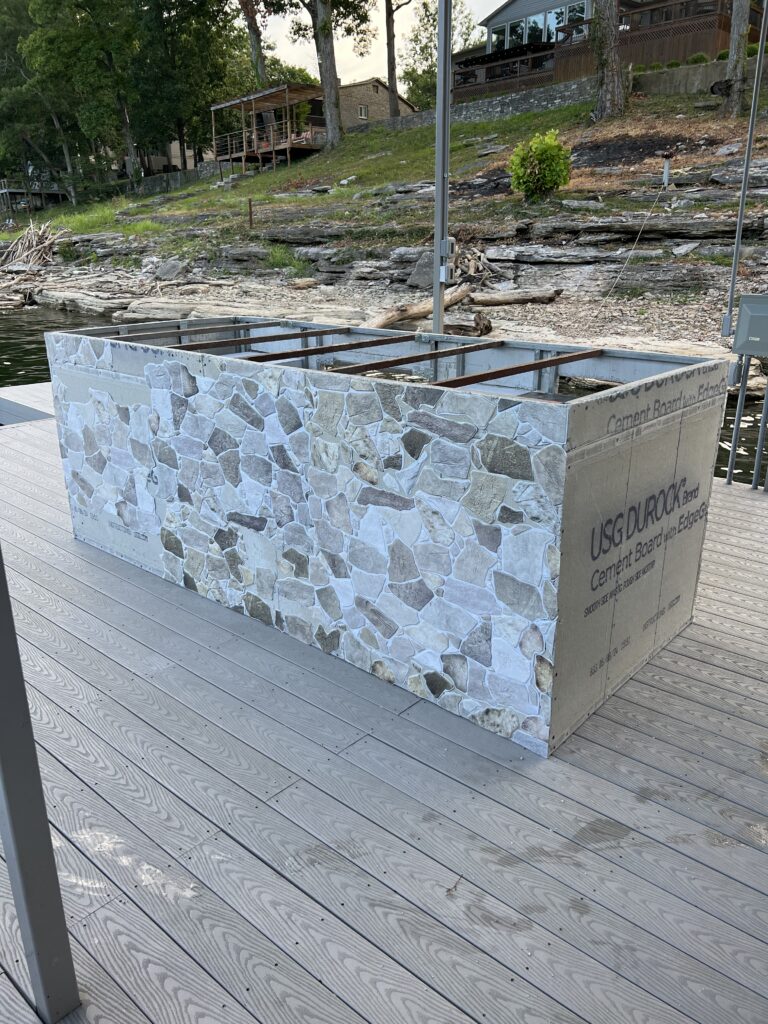
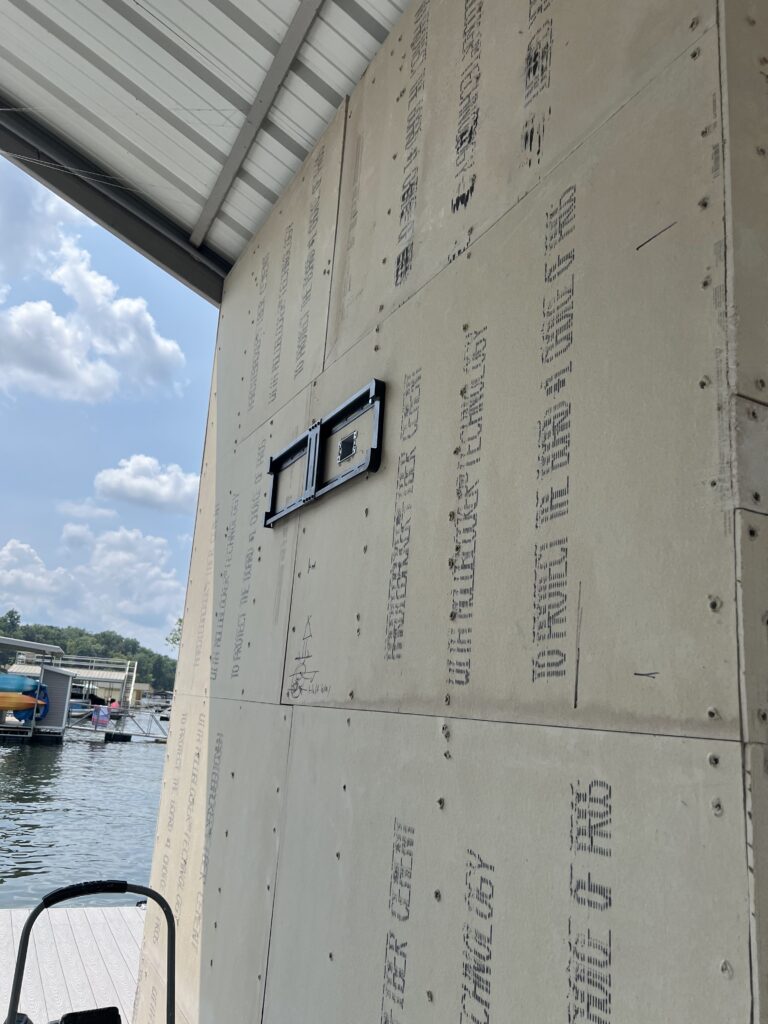
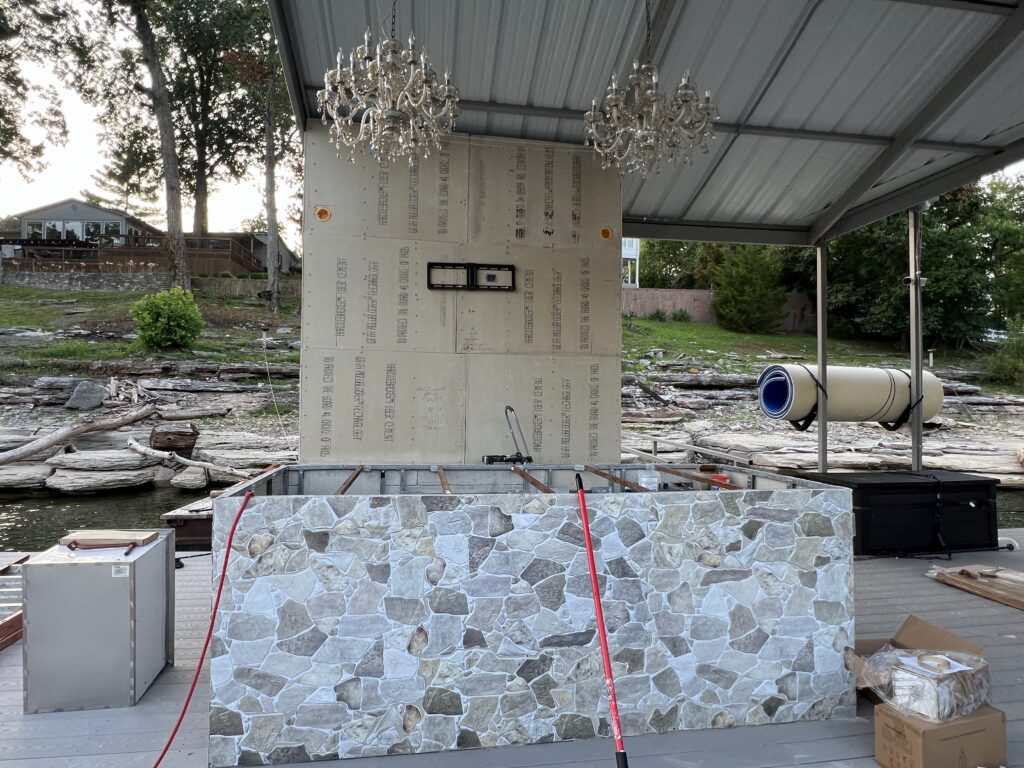
Once we had the frame built we added concrete board around the perimeter of the bar. These do not have to be cut perfect, because we will cover them with a faux stone siding. This waterproof panel siding looks so good and is very inexpensive. We used an outdoor waterproof adhesive to apply the panels, and scissors to cut the panels when needed to make the faux stone look as real as possible. This was a very tedious process and lots of cutting, especially along the edges. It was worth the time, because it ended up looking so good.
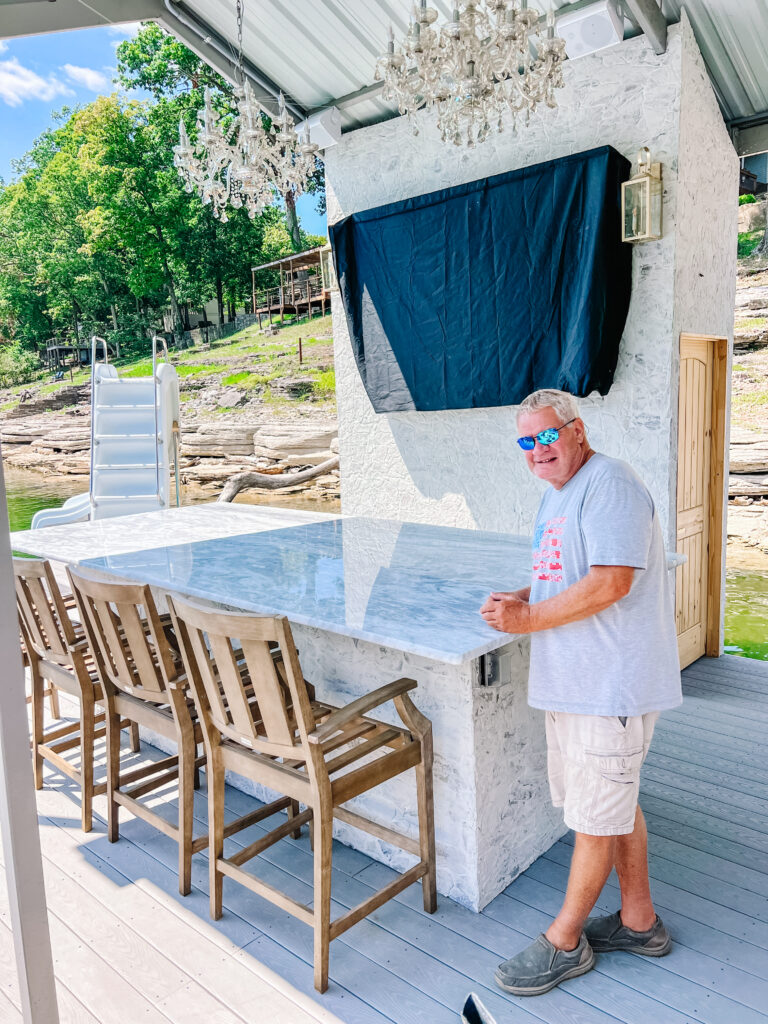
We are so close to finishing up the island, just have a few more pieces to add, including the drawers, cabinet, trash can and refrigerator.
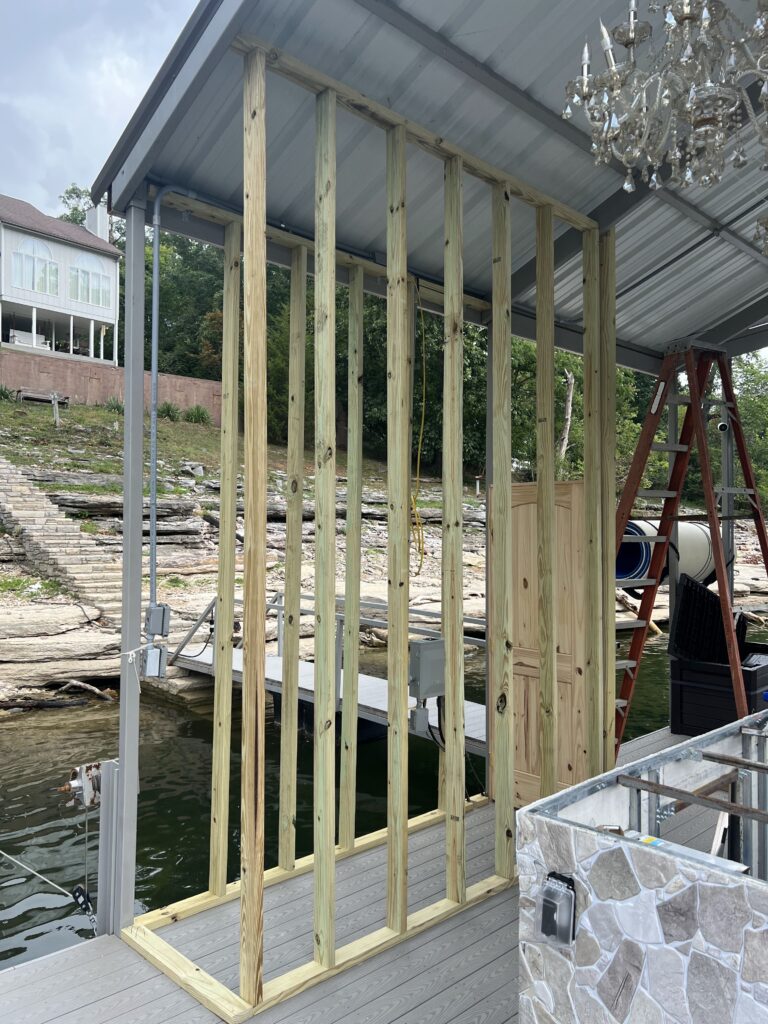
My husband then framed in the back wall/shed. He used 2×4’s and did a wonderful job. He then followed with concrete board and we added the faux stone siding to match the island.

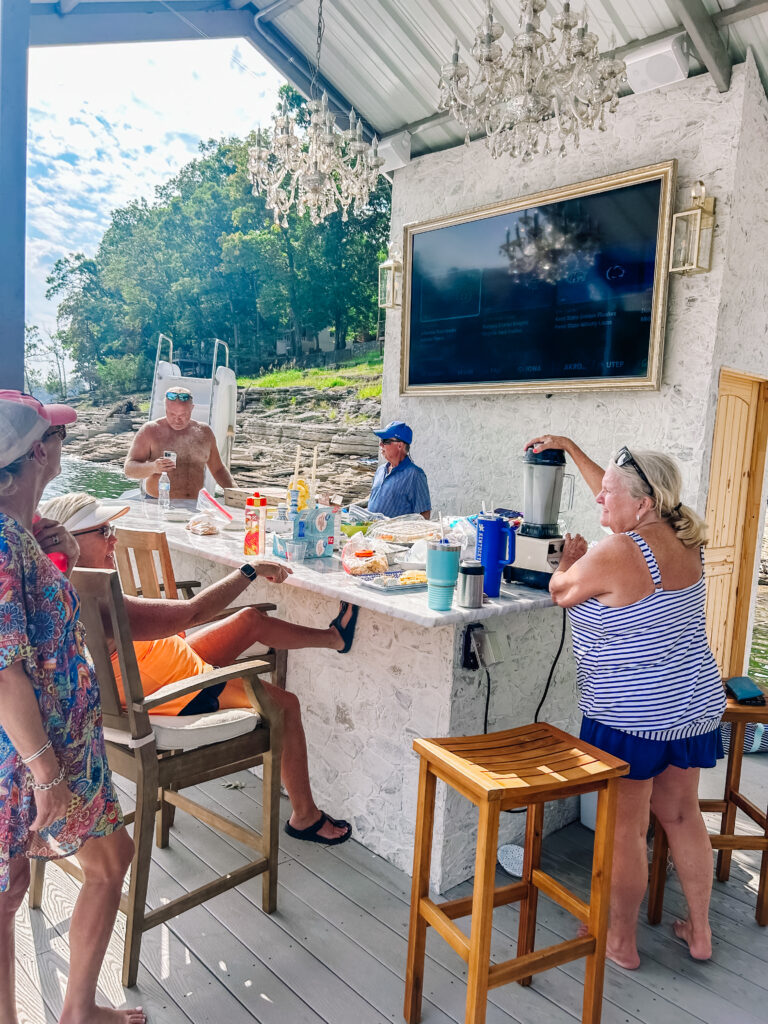
After the siding was on, we German Schmeared the siding. I love the look it gives and helps make the siding last longer, as mortar is not going anyway. For the German Schmear we used, MAPEI white mortar, a grout bag, grout sponge, trowel, ribbon mixer, a big bucket and water. We mixed the mortar and water in the big bucket, with the ribbon mixer, which attaches to any drill. Once the mixture is a peanut butter consistency you will add it to the grout bag and pipe it in between the stones. You then schmear the mortar across the stones and spread more mortar with the grout sponge. In the link below is a video that shows how we did the German Schmear as well as everything else in more detail.
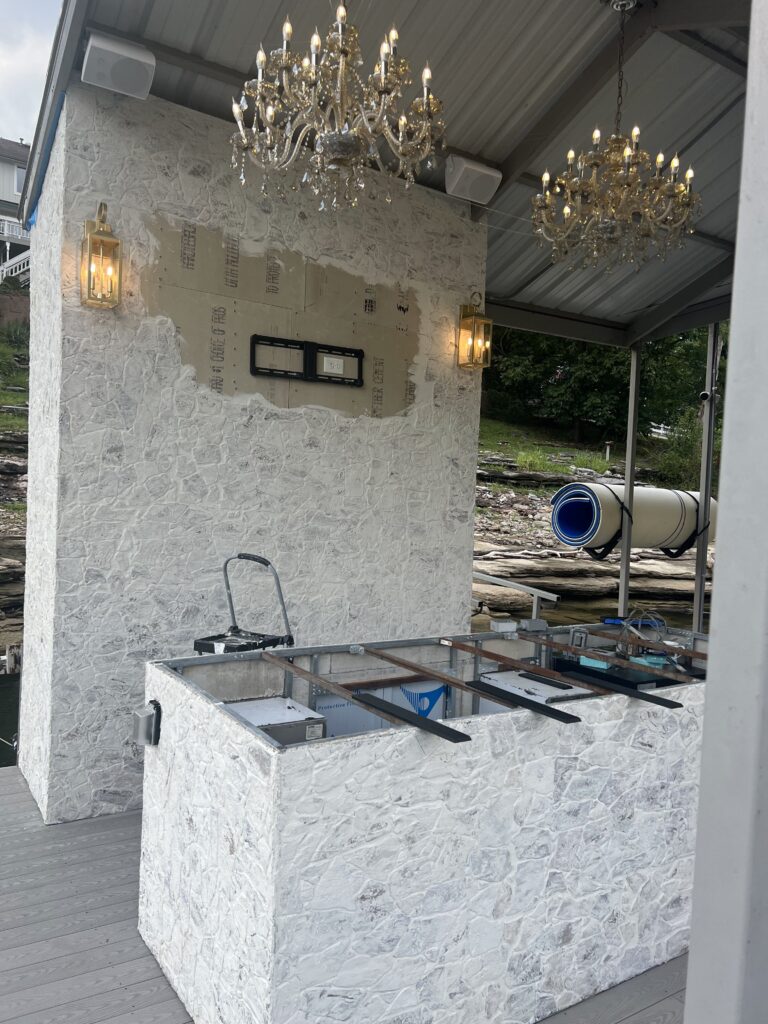
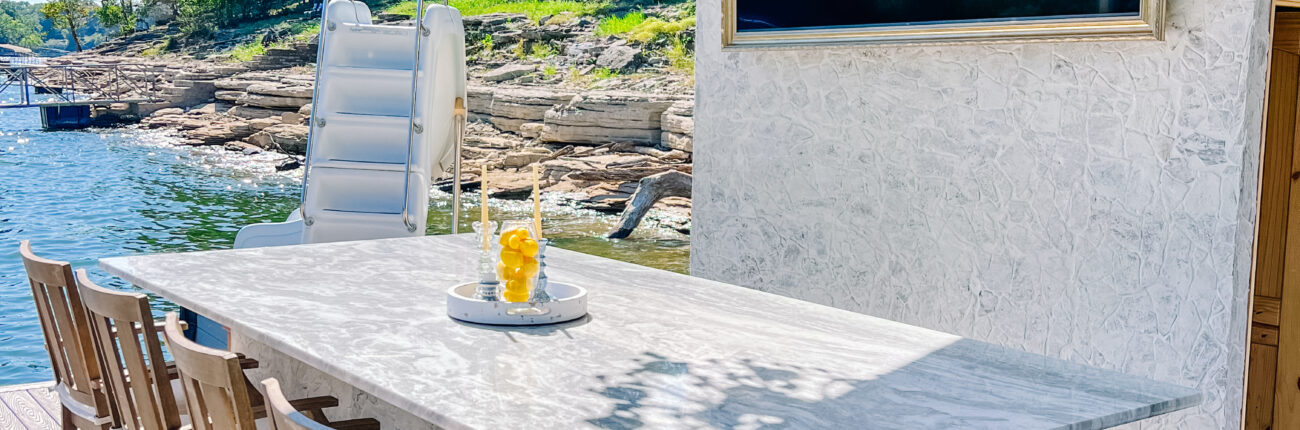
Now the finishing touches! We added a TV, frame, electricity, sconces, furniture and a marble countertop. Many advised against, however I love marble and knew we would cover the island anytime we weren’t using it.

This was a fun project and a place we will be able to enjoy years to come. Below is a link to a video that shows how we built everything in detail. Enjoy!